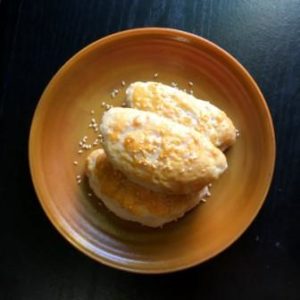
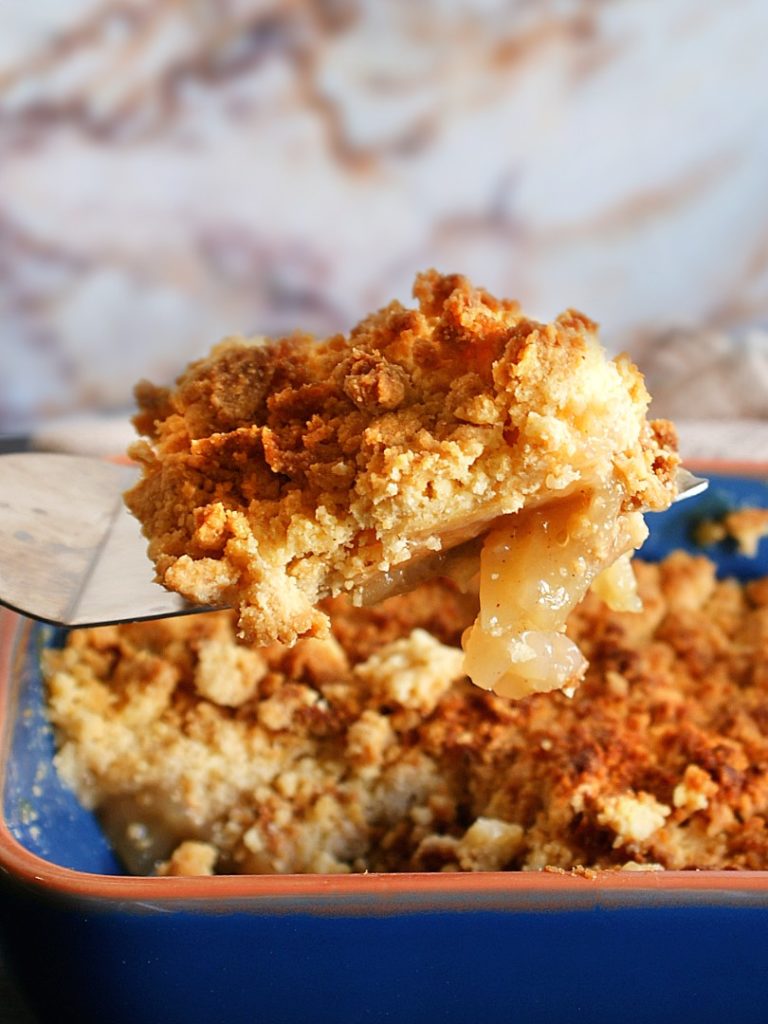
Hopiang Baboy
Hopiang baboy is a Filipino pastry I grew up with and really liked . This pastry gets different response for those who tried it. Just like marmite, You either love it, or hate it. Hopia came from the Chinese word ho-pian which means “good biscuit”. It’s similar to moon cake where the pastry has sweet paste filling and then gifted to friends. There are many variants of the hopia fillings. Two of the more popular variants are the Hopia mungo (mung bean paste filling) and Hopiang Baboy, filled with candied winter melon (kundol) and pork fat.

As Filipinos living abroad we occasionally have cravings for food that we grew up with. As food items like this are not readily available to buy, so I decided to make one at home.

The secret ingredient is always LOVE
Tips on cooking Hopiang Baboy.
- Do not over-cook or burn the onions to get a good texture of the filling.
Hopiang Baboy
Ingredients
For dough #1
- 2 cups all-purpose flour
- 1/4 tsp salt
- 1/2 cup vegetable oil
- 1/2 cup water
For dough #2
- 1 1/2 cups all purpose flour
- 1/2 cup sugar
- 3/4 cups lard / vegetable shortening
For filling
- 1/4 cup lard (pork fat)
- 1/2 cup white onion (alternative for kundol) (finely chopped)
- 3/4 cup sugar
- 1 1/4 cup flour
- 1/4 cup milk
- 1/4 tsp salt
Instructions
For making dough #1
- In a bowl, mix all-purpose flour, salt, vegetable oil and water. Then kneed until the dough is smooth. Set aside.
For making dough #2
- Take another bowl, mix all-purpose flour, sugar, lard / vegetable shortening until it becomes a dough. Set aside
Combining the two dough.
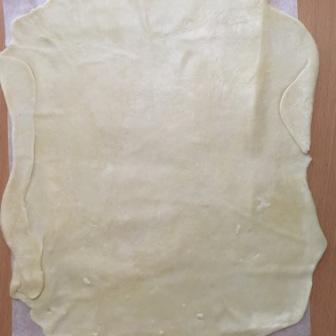
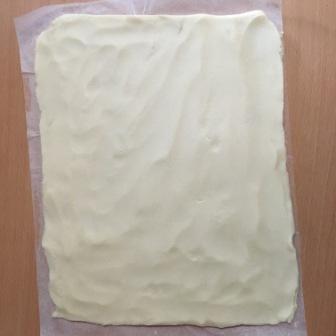
- Take dough #1 place on top of baking paper and flatten it with a rolling pin.
- Break dough #2 into small pieces and scatter on top of dough #1.
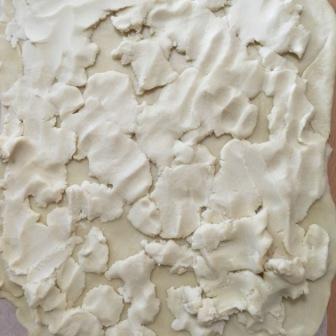
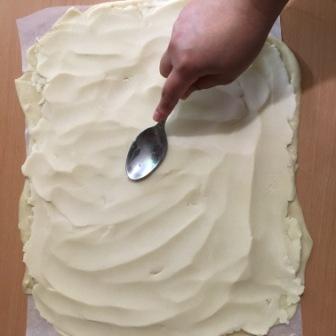
- Using a spoon, spread evenly dough #2 as shown in the photo.
- When the two dough are flat. cut the edges with a knife to make a rectangle.
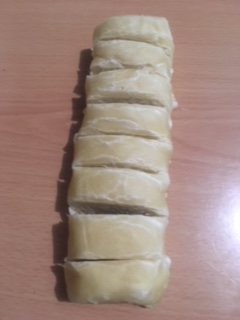
- When the edges are clean, roll the dough and wrap it with the baking paper and let it rest in the fridge for 15 minutes.

For making the filling
- In a cooking pot, heat the lard in medium heat until it melts. then add the finely chopped onions and stir until translucent (do not burn)
- Turn down to low heat and add sugar, flour and salt. Mix well until well incorporated.
- Add the milk, continue stirring until texture is sticky. Taste to adjust. Set aside to cool down.
Baking the Hopia
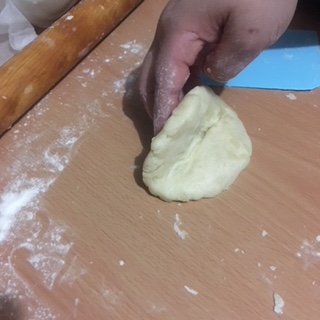
- Take the dough out of the fridge. Cut into approx. 16 pieces or depending on how big you want your hopia to be.
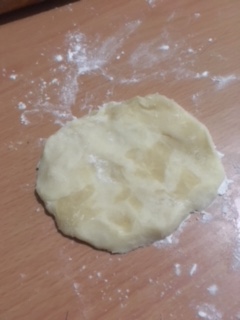
- In a flat surface. drizzle some flour and take one piece of the dough then flatten.
- Take 1 tbsp from the filling and roll it into a ball.
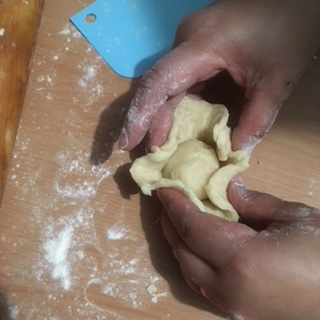
- Then wrap the dough around the filling and seal it.
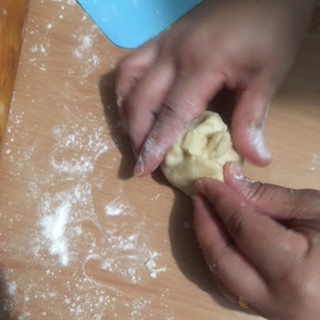
- When it’s sealed, flatten it again making sure that the sealed part is on top.

- Once it is flat, fold it in half. Do this process with all the cut dough.
- Arrange in a baking tray with parchment paper and brush egg yolk on top of each hopia and sprinkle with sesame seeds.
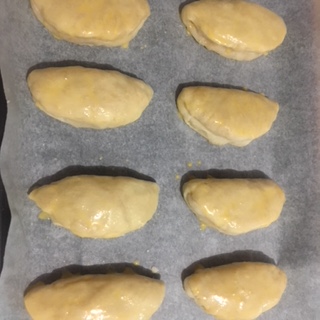
- Put in a pre-heated oven and bake @ 205°C or 400°F for 15-20 minutes. Cooking time may vary depending on the oven you Serve and Enjoy! Bon Appetit!

Nice! Great recipe of Hopia.
Hi Bebs of Foxy Folksy,
Thank you! Cheers!
Mia
I add it in my favorites,thank u,it looks yummy,will make this monday for my friends to taste 😋
Hi Lucy,
Thank you very much for the comment. I’m sure you’ll do great and please let us know how it went. Bon Appetit!
Hi,
what is the cooking temperature of the oven? it seems missing… you only say put in a pre-heated oven… thanks
Hi Laarni,
Thank you for your comment. I updated the recipe with the oven temperature included! Happy baking! Bon Chance!
I’m here in Pembroke Pines Fl USA. What can I use instead of pork fat? Wala dito yan
Hello Tess,
In the absence of lard or pork fat you can strain and save the rendered fat left behind when you fry a pork belly in a skillet or slow-cook a pork shoulder.
Hope this helps.
Hi I tried your recipe and hubby and my friends just loved. I used sweet kundol and fried green onion
instead of white onion
Hi Leonor,
Thank you for trying the recipe! I’m happy everyone enjoyed it.
what do you put or mix in the flour so that the hopia’s skin is so soft and cruchy that like freshly squeezing when its bites
Hi Antonio,
Thank you for your question. If you’re asking why the hopia is flaky, it’s because of the second dough that is scattered on top of the rolled dough.
And it’s soft just by following the ingredients and instructions in our recipe. Another important thing is the egg wash to make the hopia golden and shiny.
Hope this helps and good luck!
Hi, can i use bacon oil instead of lard?
Hi Marlyn,
I’m not so sure about bacon oil as it may be too salty? You can replace the 1/4 cup lard with just 1/4 cup cooking oil.
Thank you and best of luck baking!
Thanks for sharing.. I will try to make this on the 20th of May..
Is onion an Option for kundol??
Or is there another Option that will give the filling more delish??
You’re welcome and good luck in making this. Yes, onion is an alternative for kundol.
Ganda your recipe is so easy to follow… It was a success ❤️💕
Hey Karen,
Thank you and I’m happy you did great. Bisous!
Thank you so much for sharing your recipe ❤️
I followed your recipe and ingredients and it is perfect and super delicious 😋 ..wish I could send you the photos
Hi Sally,
Thank you so much for the positive feedback! I’m happy you liked it. Cordiallement!
This recipe is easy to follow. Followed all for the dough but I changed the recipe for filling to chopped apples, apparently, some people didn’t like pork on sweet pastry. But it works.
Thank you for sharing your recipe. It is perfect and so delicious. I had lots of customers.
Hi Rosalie,
Thank you for trying our recipe! Goodluck and all the best to your business. Please kindly rate the recipe if you can. Cheers!
hello. what can be possible replacement if lard/ vegetable shortening is not available?
Hi Rizky,
You can use vegetable oil as alternative. Hope this helps and let us know how it went. Goodluck
Hi, I will try this as I am at the moment is making the pan de sal.I only have strong bread flour where I can get fromLIDL as I live her in tje UK. I also made one uaing all lurpose flour see which one will make the best pan de sal.I always go to Paris as my mom lives in Balard.Merci.
Bonjour Roselle,
Balard is not too far from us, Let us know how it goes if you use strong flour yeah? Cheers
This looks like a really good recipe and it’s nice to see feedback from those who made it. Meron ba itong video to watch how you made it? Being a new baker longing for the food we had growing up.. your technique would be essential for my possibly C+ outcome in making your recipe. Thank you.
Hi Cha,
Yes, look for our FB page and the video is there or if you could wait we will upload the new video we’re making to the recipe card itself. Don’t settle for C+ I’m sure you’ll do great!
i will try this recipe with ground pork filling almost similar to empanadas..
Hi Alejandra,
I’m not sure if it will work but if you will try it, I suggest cooking the ground pork filling first before stuffing it in the pastry. Good luck.
Thanks 😍… i liked all your recipes… this hopia mostly. God bless. Thanks for sharing
Hi Diana,
Thank you! Cheers to more cooking and baking.
Fool proof recipe! It’s delicious and easy to follow! 5/5 Thank you for sharing!
Thank you Trixie!
Can u use butter instead of lard/shortening
Hi Gen,
Happy New Year! Yes you can use butter or margarine instead of lard/shortening for the DOUGH. But for the filling it’s should be lard. Hope this helps.
Best Recipe. I used vegetable oil instead of lard and butter for sauteing the filling. Works perfect.
Hi Joselyn,
Thank you and happy baking!
Shelf life?
Hi Maria,
They can last for 5 days in an airtight container at room temperature and 2 weeks if refrigerated.
So love this recipe, easy to follow🥰🥰🥰 baked many times and i used Olive Oil in lieu of Lard or Oil shortening…
I used white onion and less sodium spam chopped finely… always a hit!
Thanks for the recipe❤️
Hi Thelma,
I’m so happy you like it. Thank you for a great review.