Royal Bibingka
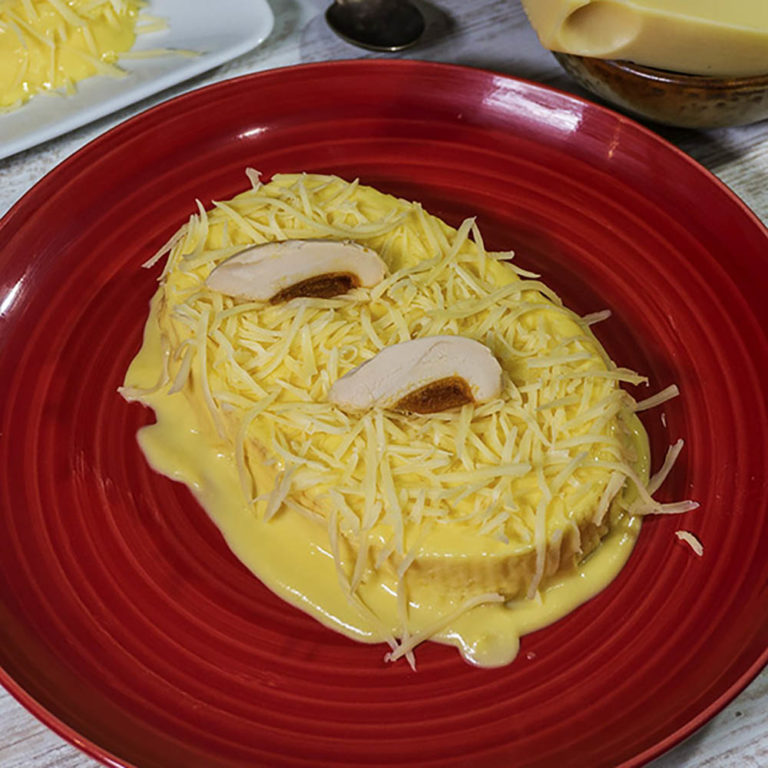
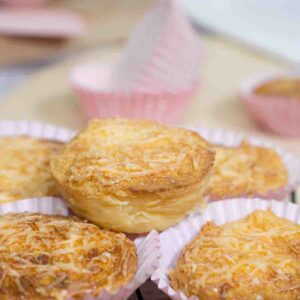
Royal Bibingka is a traditional Filipino rice cake that combines a delightful blend of flavors and textures. This cheesy-crust, chewy, and soft treat is synonymous with Christmas season in the Philippines.
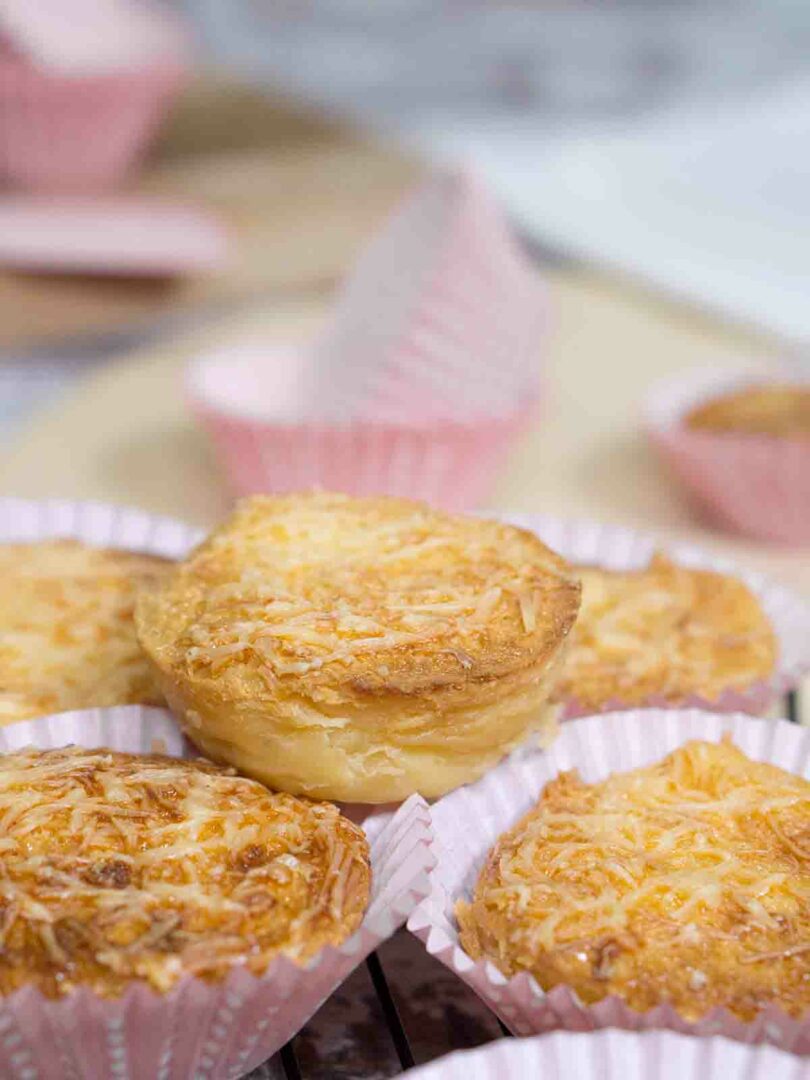
When it comes to Filipino delicacy, few can match the rich and festive flavors of Royal Bibingka. It is one of my favorite dessert after a hearty Noche Buena along with puto bumbong. For many Filipinos, the taste of bibingka is a cherished memory associated with the holiday season. It’s a comfort food that evokes nostalgia and a sense of homecoming.
This royal bibingka recipe is a great addition to your sticky rice cake recipes. It’s easy and comes together in 30 minutes or less. It’s not only a delicious after-meal dessert but can also serve as a meryenda (afternoon snack), holiday gifts or pasalubong.
Where did Royal Bibingka come from?
Royal Bibingka has a rich history deeply rooted in Filipino culture. Its origins can be traced back to pre-colonial times when rice was already a staple food in the Philippines. It’s popular in Vigan, Ilocos Sur that resembles cassava cake or even Filipino cheese cupcakes.
Over the centuries, as the Philippines was influenced by various cultures, the bibingka recipe evolved. The addition of coconut milk, sugar, and toppings like grated cheese and salted eggs are said to have been introduced during the Spanish colonial period, adding layers of complexity to this beloved dessert.
What is Royal Bibingka made of?
Royal Bibingka is a traditional dense rice cake that combines a harmonious blend of flavors and textures. Here are the key ingredients that make it special:
Why do we eat bibingka during Christmas?
The tradition of eating bibingka during Christmas in the Philippines is deeply ingrained in the country’s culture. There are several reasons behind this delightful custom:
Simplicity and Warmth – Christmas in the Philippines is often celebrated with a sense of warmth and simplicity. Bibingka, with its humble yet comforting ingredients, embodies this spirit perfectly. It’s a reminder of the joy of sharing and coming together as a community.
Family and Tradition – Christmas is a time for families to gather, and bibingka serves as a centerpiece of Filipino family traditions. It’s often enjoyed together after attending the Misa de Gallo (Simbang Gabi), the early morning Christmas Mass.
Street Food Stalls and Vendors – During the Christmas season, the streets of the Philippines come alive with bibingka stalls and vendors. The aroma of bibingka being cooked over hot coals fills the air, creating a sense of festivity and anticipation.
Frequently Asked Questions (FAQs)
Cooking Tips
How to Serve and Store
You Might Also Like
Royal Bibingka
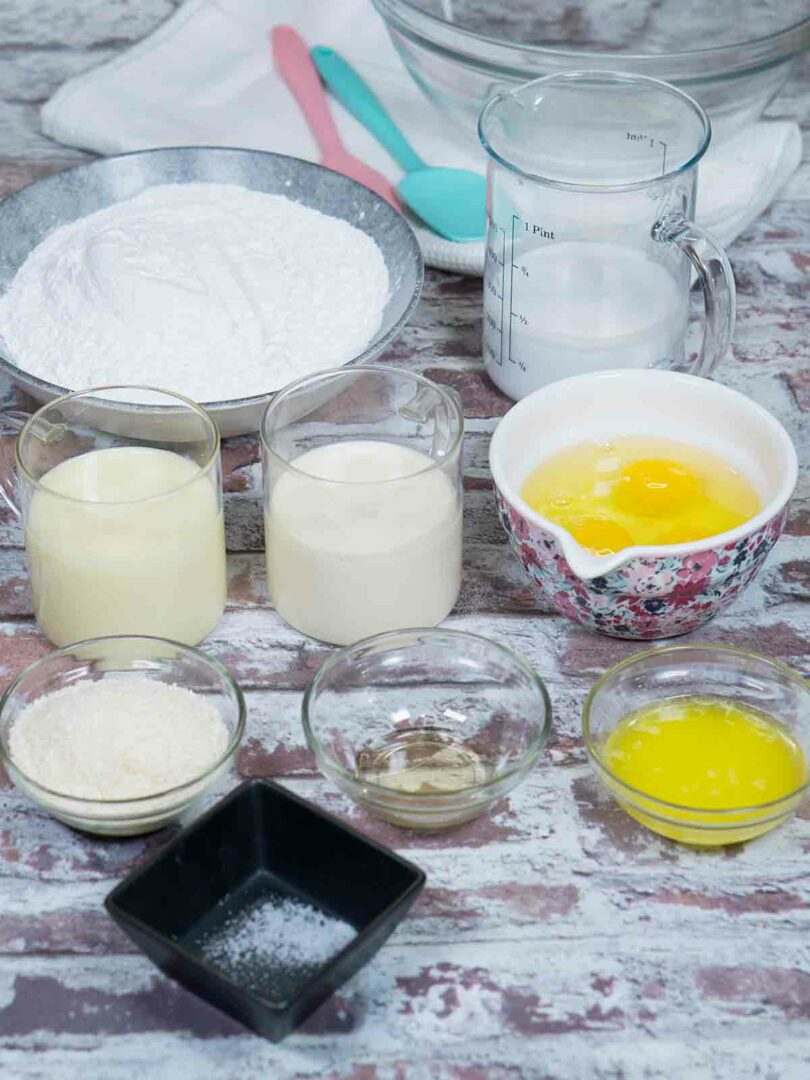
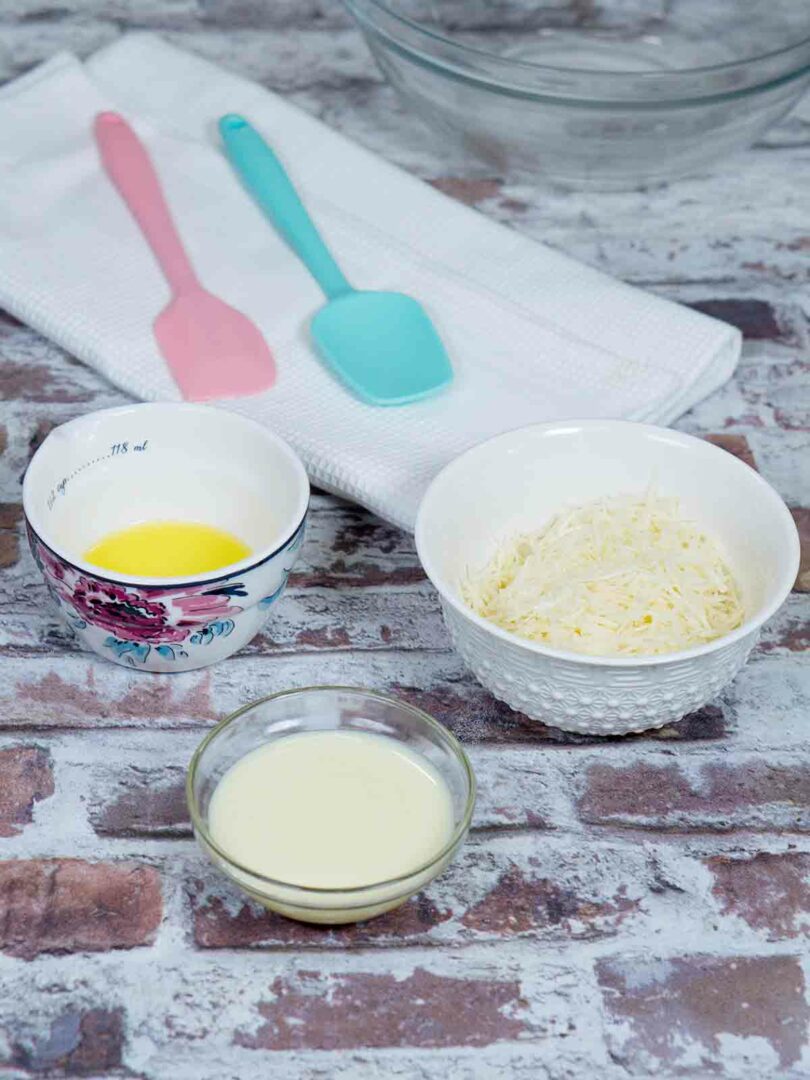
Ingredients
- 2 cups glutinous rice flour
- 200 ml coconut milk
- 200 ml evaporated milk
- 1/2 tsp vanilla extract
- 400 ml condensed milk
- 3 large eggs
- 2 tbsp butter (melted)
- 3 tbsp desiccated coconut (or macapuno strips)
- dash of salt
Instructions
- Pre-heat oven at 180°C/356°F and generously grease muffin pan with butter. Set aside.
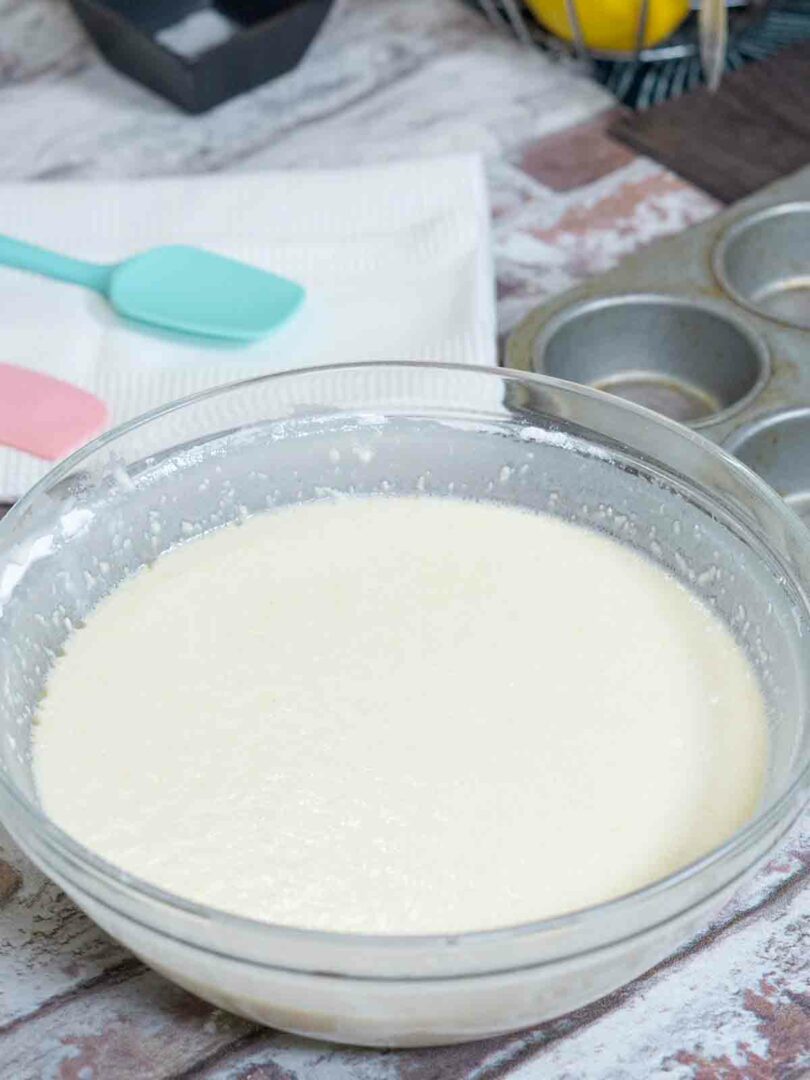
- In a mixing bowl, crack and place eggs then beat until light in color.200 ml coconut milk, 200 ml evaporated milk, 1/2 tsp vanilla extract, 3 large eggs, 400 ml condensed milk
- Add evaporated milk, coconut milk, vanilla extract, and condensed milk. Stir until fully incorporated.
- Add glutinous rice flour into the wet ingredient gradually while stirring between additions. Mix until no trace of flour is left.2 cups glutinous rice flour
- Tip in desiccated coconut, melted butter, and salt. Mix until fully combined2 tbsp butter, 3 tbsp desiccated coconut, dash of salt
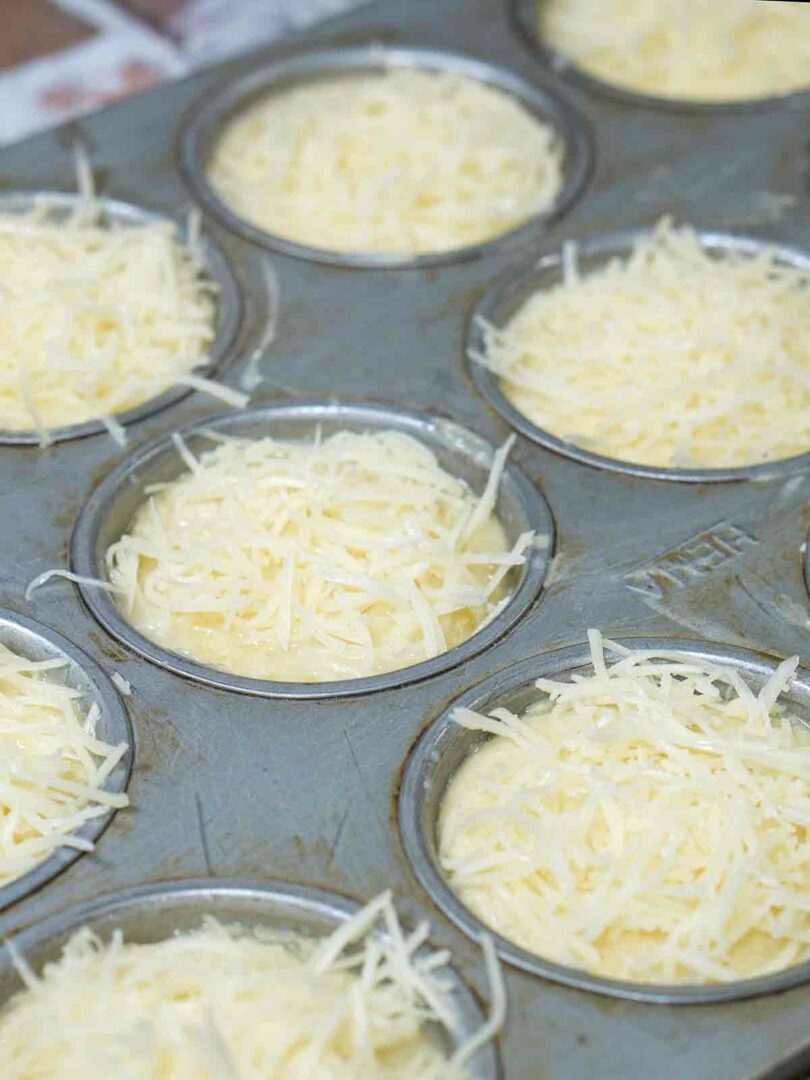
- Transfer batter into prepared muffin pan. Fill each mold with approximately 1/4 cup of batter.
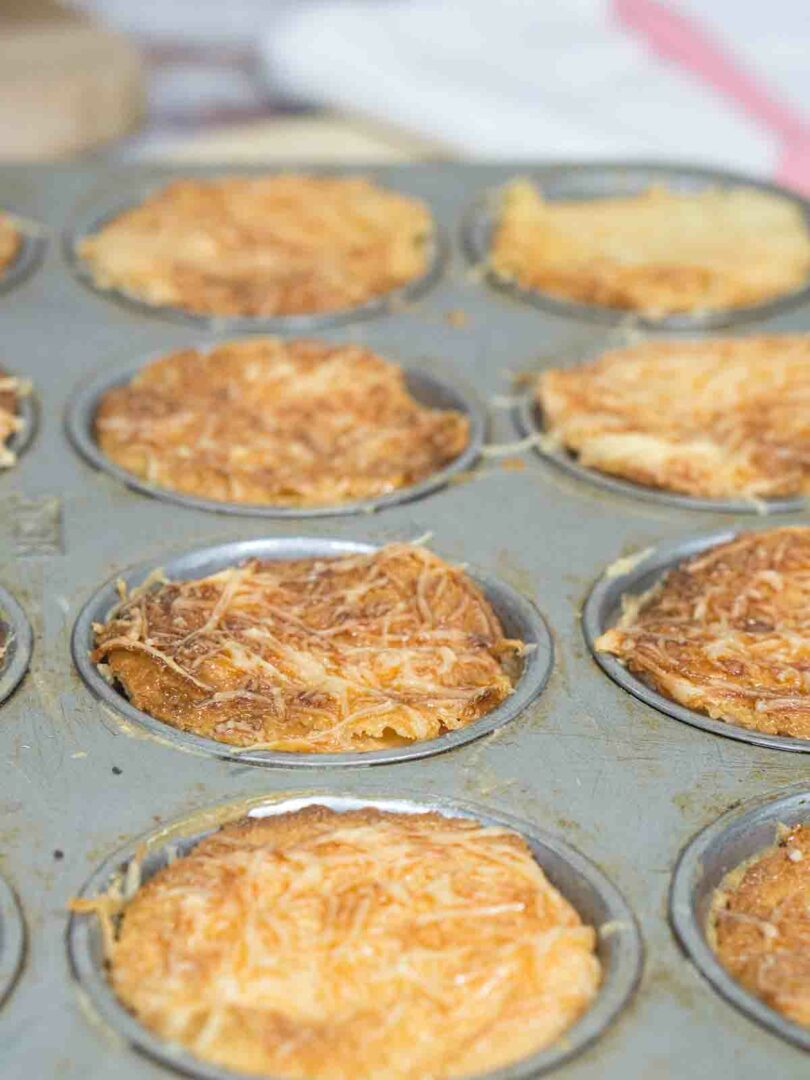
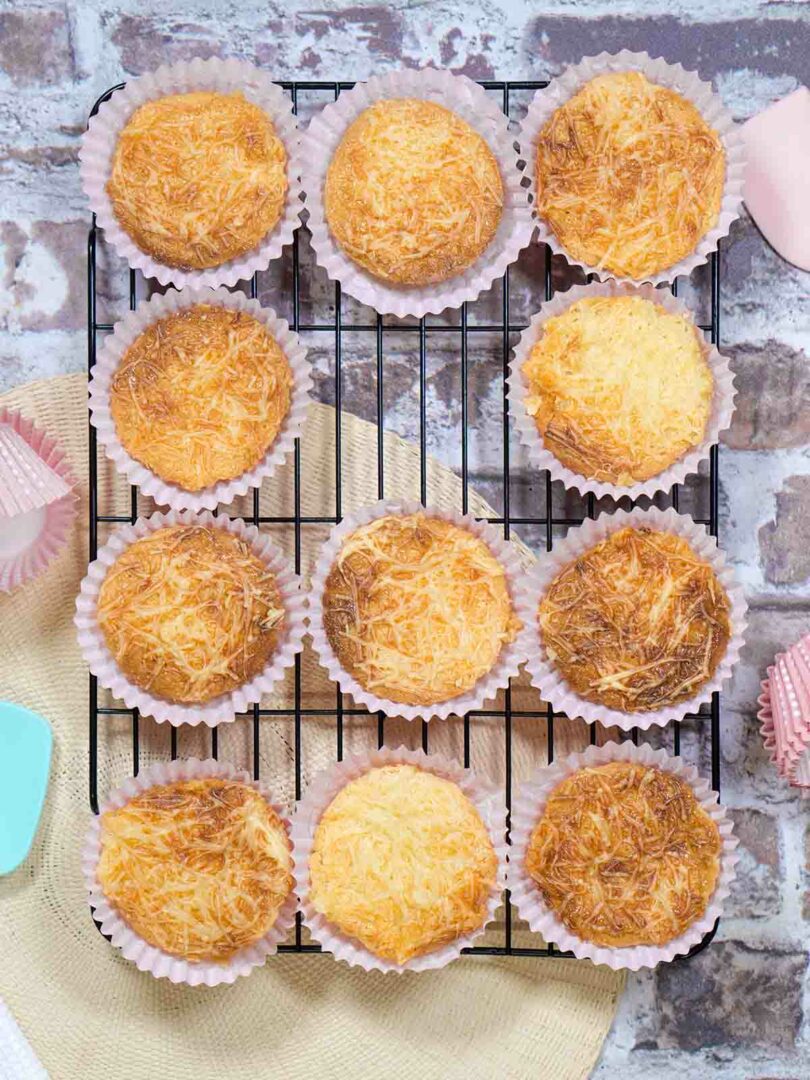
- Bake in pre-heated oven for 10 minutes then carefully remove the cakes and brush top with melted butter and top with grated cheese.
- Bake again for 25-30 minutes or until cheese is golden brown and and an inserted toothpick comes out clean.
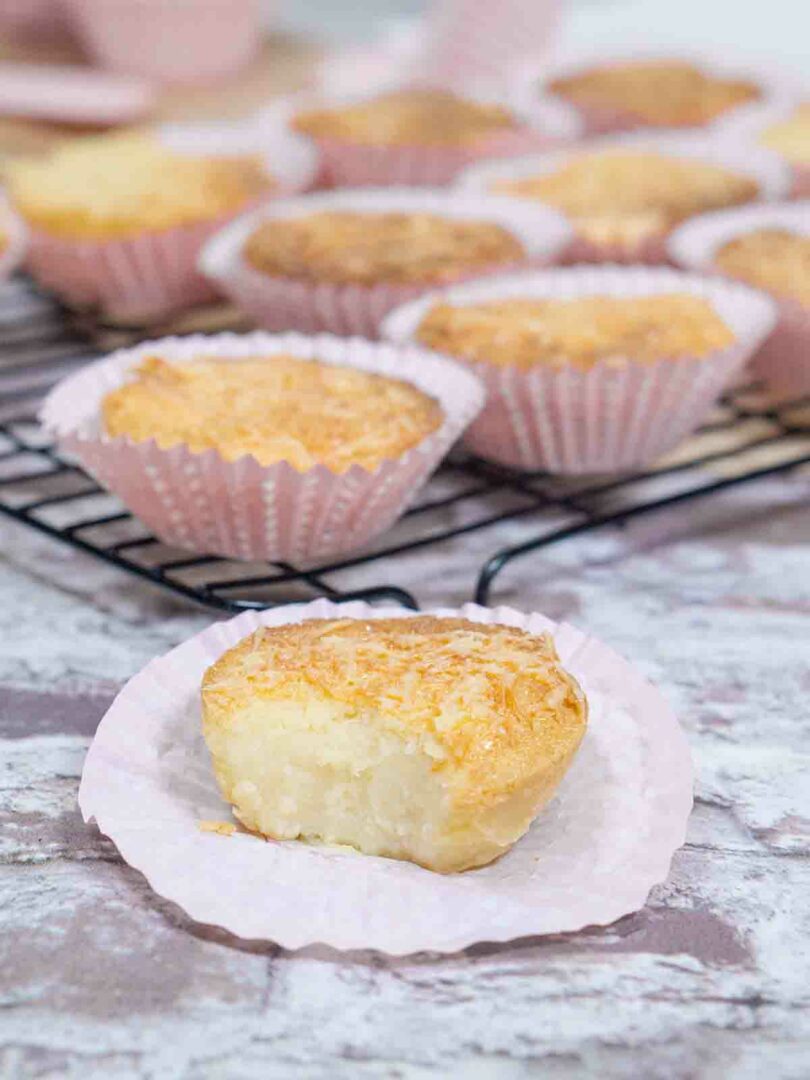
- Remove from the oven and let it cool down. Once cool enough to handle, remove the cakes from the mold and place each piece in a cupcake or muffin liner.